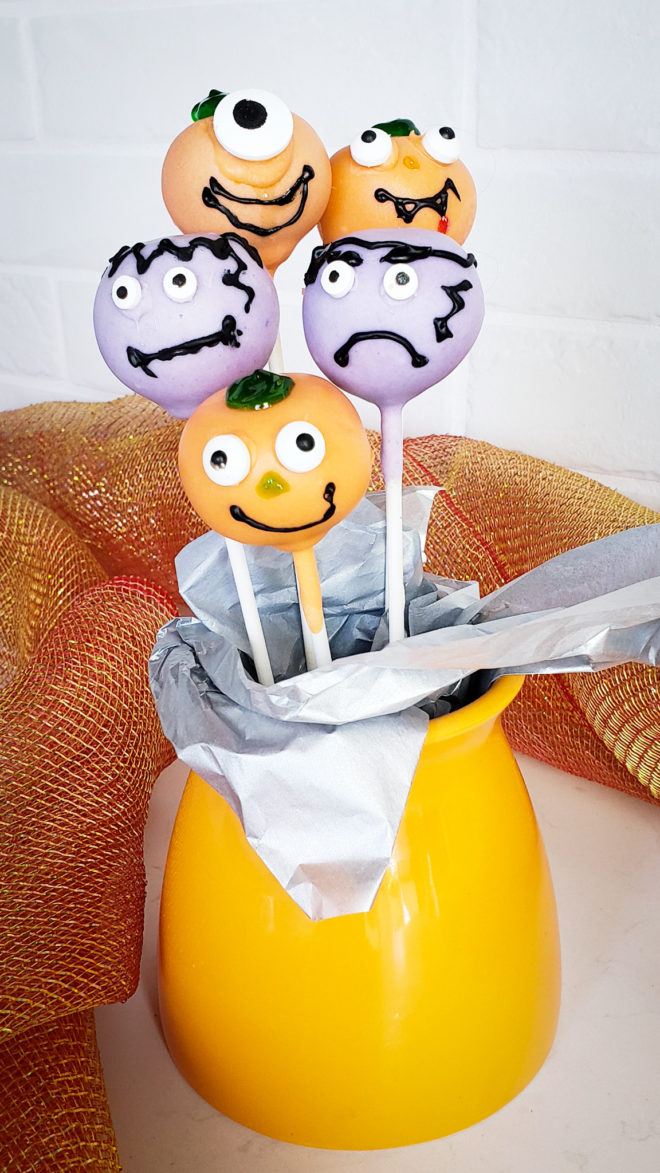
Halloween Cake Pops
With brightly colored vanilla cake on the inside and pumpkin and monster chocolate décor on the outside, These Halloween Cake Pops ideas will be the hit of any Halloween event!
Cake Pop Halloween Ideas
These ghoulish treats are a great project for families to create over Halloween. The recipe is great for kids as you mix together spongy vanilla cake, frosting, and food coloring.
My daughter loved how the food coloring became brighter the more she mixed. Decorating them together was a fun-filled, bonding time. We had a blast making faces on the mini pumpkins and Frankensteins.
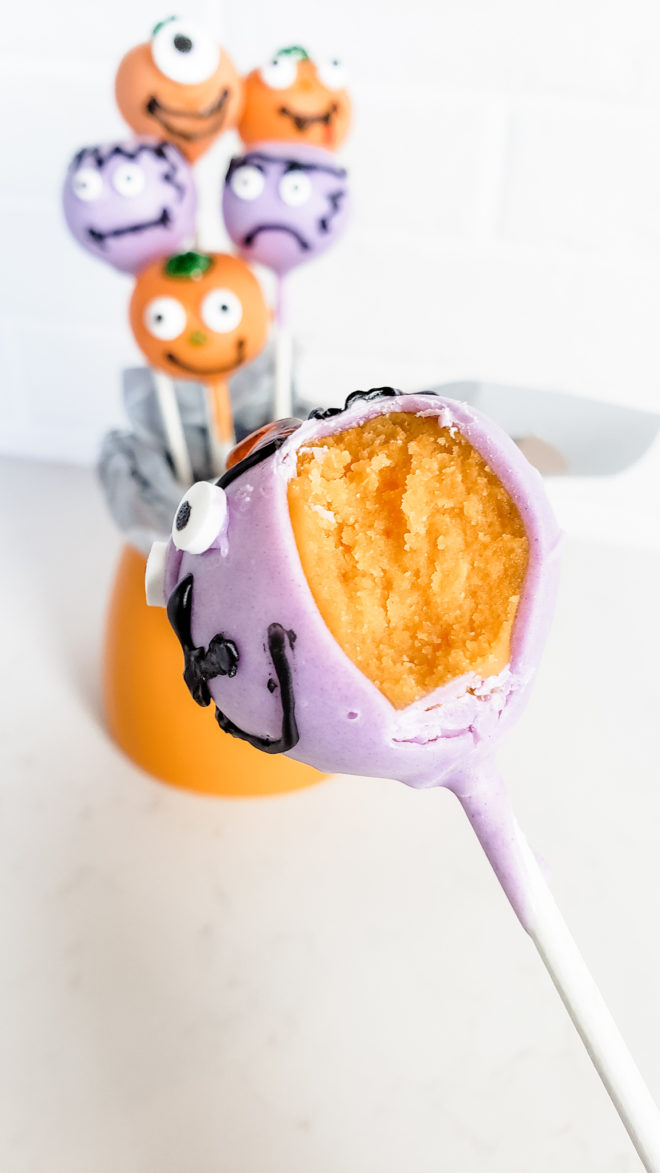
The best part is biting into a hard white-chocolate, candy-shelled pumpkin with a gooey, sweet cake batter inside. They are so tasty, and they are fantastic for a group. Instead of cutting pieces from a dessert, guests can simply take a decorative cake pop and move on. It’s easier than handing out candy on Halloween!
Why you will love Halloween Cake Pops
- All ages can join in on the fun with this project!
- Create a yummy treat and Halloween decor in one!
- Easy to transport and hand-out, they make a great gift!
How to Make Perfect Halloween Cake Pops
Main Ingredients and Tools:
- Vanilla Cake Mix
- Vanilla Frosting
- Food Coloring
- Cake Pop Sticks
- Decorative Sugar Eyes
- Decorative gel or frosting
- Either a Cake Pop Stand or Styrofoam and a Short Vase
Directions
Step 1: Bake Your Cake
Using the directions on whatever mix you buy, bake and then cool. It’s okay if you get the outsides a little crisp with this recipe because it’s easier to take the crust off that way.
Step 2: Cut the Crust
Use the longest knife you have, like a bread cutting knife to take off the crust of the cake. You can’t use the crust because it will be too hard to mix in with the rest of the cake.
Step 3: Crumble, Add Frosting, Add Food Coloring
Crumble up the inside of your cake in a large bowl. Add a tablespoon of frosting and several drops of food coloring. Using your hands, mix together well until you have a consistent texture and color.
Step 4: Make into Balls
You can either use a melon ball scoop or again your hands to turn your cake mix into balls. If your balls are breaking apart, add a little more frosting. The balls should be about the size of a ping-pong ball. Set them on a tray covered in wax paper.
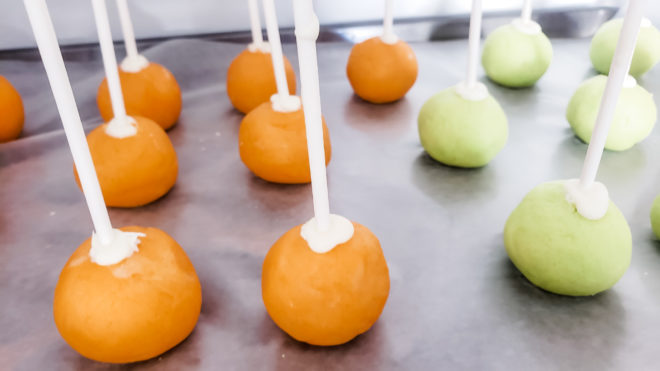
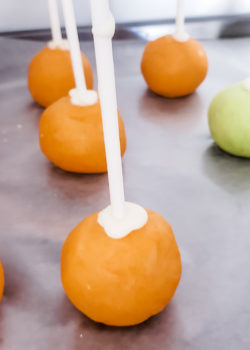
Step 5: Add Sticks and Freeze
Melt enough chocolate to dip the end of the tips of your cake pop sticks into. When the tips are coated, insert them into the cake pops. Freeze for fifteen minutes or overnight.
Step 6: Melt, Color Chocolate, and Dip
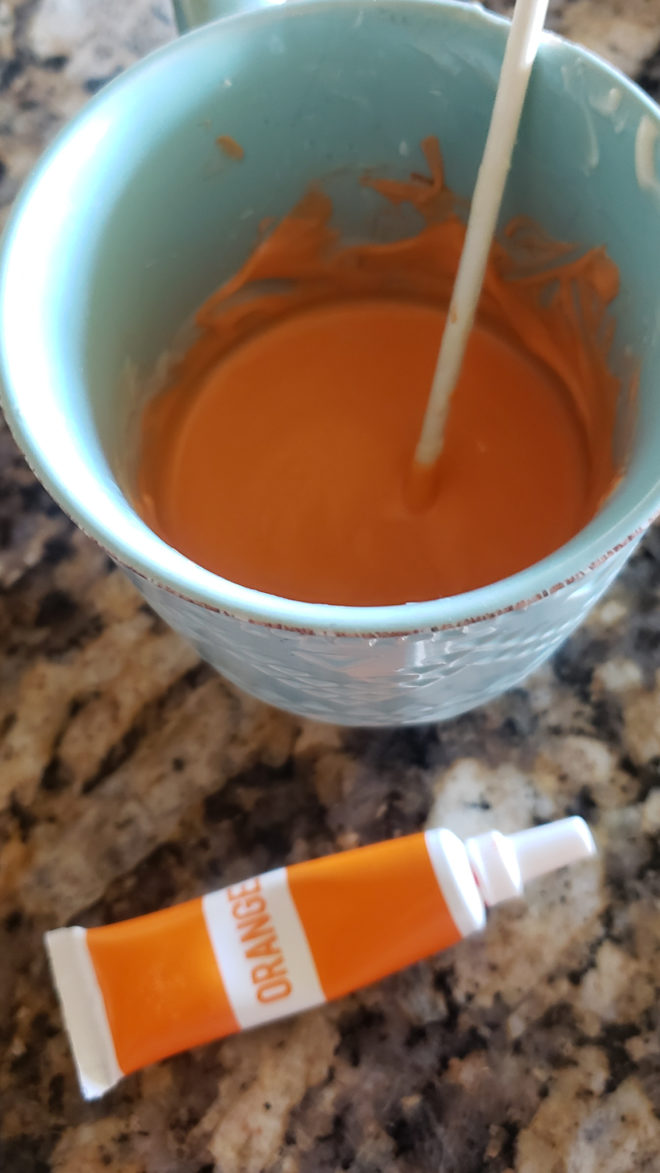
Melt your chocolate in the microwave in twenty second increments, taking care not to heat the chocolate too much. Put the chocolate in a mug or tall cup.
Add food coloring. Mix well. Take your frozen cake-pops and coat. Tap the pop on the side of the cup to take off excess chocolate. After coating, insert into styrofoam or a cake-pop stand.
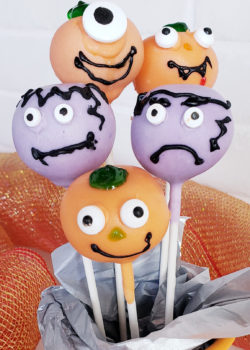
Step 7: Decorate
Using remnants of melted chocolate, take a tooth pick and add melted chocolate to the back of the candy eyes. Press lightly, to adhere eyes onto the cake. Using the decorative frosting, make silly faces on your pops. If you’re doing pumpkins, use green jell to create the stem on top. Black decorating frosting worked well for the noses and mouths.
Step 8: Add Styrofoam to a Vase
Cut up styrofoam so that it fits into the base of a small vase. Add any decorative paper or ribbon. Using a skewer, poke holes where you want your cake pops to go in the styrofoam. Arrange your cake-pops and serve.
Frequently asked Questions
What is the trick to making cake pops?
The trick to making the best cake pops is to use good ingredients. Use your favorite cake mix and frosting. Don’t overheat your dipping chocolate.
If you overheat, the chocolate will get too thick and there is no saving it. Some blogs will tell you to add things like coconut oil, but I find that it’s best to just start over with dipping chocolate; stir more, and heat less.
How far in advance can you make cake balls before putting on the chocolate?
You can store cake balls without the chocolate on them for 2-3 days in the refrigerator. If you freeze them with the sticks on, they can last for two months. However, be sure to seal them in an airtight container.
When you are ready to decorate them, don’t thaw all the way. It’s easier to dip semi-frozen cake-pops in chocolate than ones that are dethawed. However, if the cake is too cold, it could crack the frosting. SO it’s better to let it mostly dethaw. The cake will dethaw the rest of the way, inside the chocolate coating, inside your refrigerator.
Can cake pops stay at room temperature?
Cake-pops do well displayed on the counter for up to two weeks. There’s no need to refrigerate cake-pops, once they are fully formed. However, if your kitchen gets too warm, the chocolate could melt. Storing your cake pops in the fridge is ideal and will help your treat last a full three weeks.
How long do cake pops last?
Cake pops that have the full chocolate coating and decorations on them can last for at room temperature for about a week. It’s best if they are in an air tight container if stored at room temperature. If you put the pops in a refrigerator their expiration can extend to 2-3 weeks.
If you need them to keep longer than that, you may want to not dip and decorate them. Store the formed balls in the freezer and then when ready, dip them in chocolate and decorate.
For More Creative Up-Coming Holiday Ideas, Check Out:
Pumpkin and Apple Pie-in-a-Pie
Halloween Cake Pops
With a white-chocolate candy shell on the outside and gooey cake batter on the inside, these Halloween cake pops will be a hit at your next party!
Equipment
- cake pop stand or Styrofoam and a short vase
- cake pop sticks
- freezer
- skewer
Servings 12
Calories 232kcal
Ingredients
- 2 trays dipping chocolate white
- 1 cake mix
- 3 eggs
- 1/2 cup vegetable oil
- 1 cup water
- 1 tbsp frosting
- 2 tsp food coloring
- 24 candy eyeballs
Instructions
- Using the directions on your cake mix box, bake and then cool.
- Using a long bread knife, remove the crust of the cake on all sides.
- Crumble the inside of the cake into a large bow. Add a tablespoon of frosting and several drops of food coloring. Use your hands to mix together well until you have a consistent texture and color.
- Use a melon ball scoop or your hands to make cake balls. Once formed, set them on a tray covered in wax paper or parchment.
- Melt 2 tablespoons of chocolate. Dip the end of the cake pop sticks into chocolate. Then insert into the cake balls. Freeze for fifteen minutes.

- Melt dipping chocolate, 20 seconds at a time in the microwave. Stir continuously. Do not overheat. Pour the chocolate into a mug or tall cup. Add several drops of food coloring. Mix well. Coat cake pops in chocolate. Tap the pop on the side of the cup to take off excess chocolate. After coated, insert into Styrofoam or a cake pop stand.
- Using remainder of the chocolate, use a tooth pick to add melted chocolate to the back of the candy eyes. Press lightly to adhere eyes on the the cake pop surface. Using the decorative frosting, make faces and either pumpkin stems or Frankenstein hair on your cake pops.
- Serve right away or store in the refrigerator for up to three weeks.
Nutrition
Calories: 232kcal | Carbohydrates: 49g | Protein: 3g | Fat: 3g | Saturated Fat: 1g | Polyunsaturated Fat: 0.5g | Monounsaturated Fat: 1g | Trans Fat: 0.2g | Cholesterol: 35mg | Sodium: 316mg | Potassium: 45mg | Fiber: 0.5g | Sugar: 31g | Vitamin A: 53IU | Calcium: 103mg | Iron: 1mg
Follow On Pinterest Follow @bewitchinkitchen On Pinterest for more delicious recipes!
Tried this recipe?Mention @bewitchinkitchen or tag #bewitchinkitchen so I can see it!