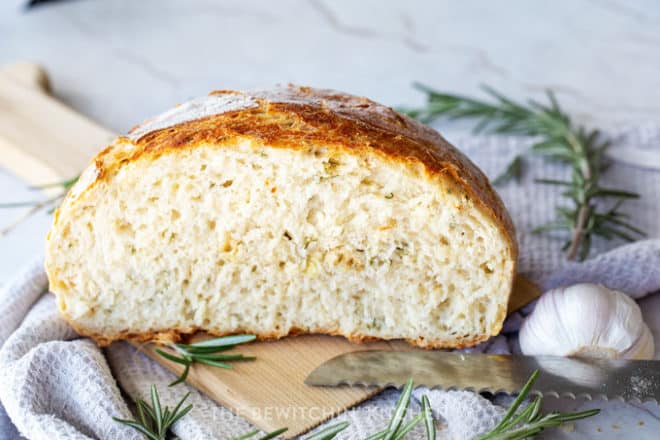
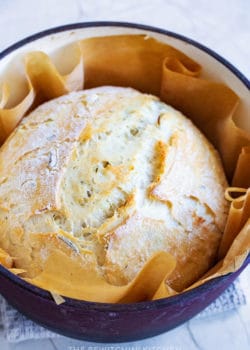
Garlic Rosemary Bread

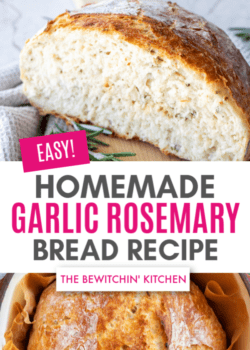
Have you ever baked bread before? If not, you’re going to love how easy it is. This dutch oven garlic rosemary bread recipe is one of my new favorites, and it’s so simple. There is seriously nothing more comforting than homemade bread.
Disclosure: This post contains affiliate links for your convenience. As an Amazon Associate, I earn from qualifying purchases.
Artisan Bread with Garlic and Rosemary
I love artisan bread. The end.
Kidding, but homemade bread is something that makes my heart sing. I’m not going to lie. The best part is that is it’s so easy, so simple, and so delicious.
A few weeks ago I came across this No Knead Bread recipe from Gimme Some Oven and it’s delicious. I used it as a guide to dress it up and lower the flour a bit for this crusty rosemary and garlic bread recipe.
I had never baked bread with a dutch oven before and after Ali’s tutorial, I’ll never do it differently ever again.
Supplies Needed For Roasted Garlic Bread
There isn’t much you need, aside from the ingredients, but I do recommend the following:
- Parchment Paper
- Dutch Oven (I have a ceramic KitchenAid dutch oven that I received as a wedding gift, but I can’t find it online. I have ordered an Amazon Basics brand one to try out to see how it works, I’ll report back.)
I haven’t made this recipe without a dutch oven, so I don’t know how it will turn out without it. The dutch oven helps the bread bake with steam.

How long does bread need to rise?
There are a few factors involved in having artisan breads rise: the temperate of your home, the type of yeast you used, the flours, your elevation. It all matters. So you may have to experiment a bit to find what works best for your situation but I’ll share what works for me.
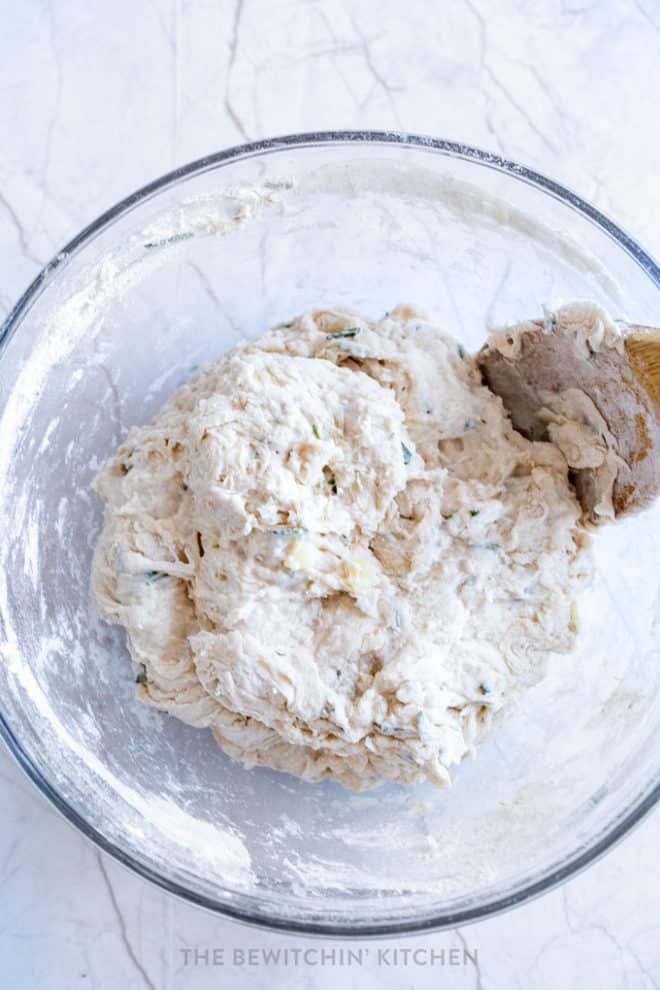
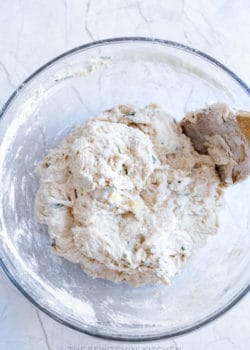
I simply combine all the ingredients into a mixing bowl and stir it together with a wooden spoon. I don’t bother kneading this recipe and it’s so freeing). The less work, the better. I am always looking for the simplest route possible.
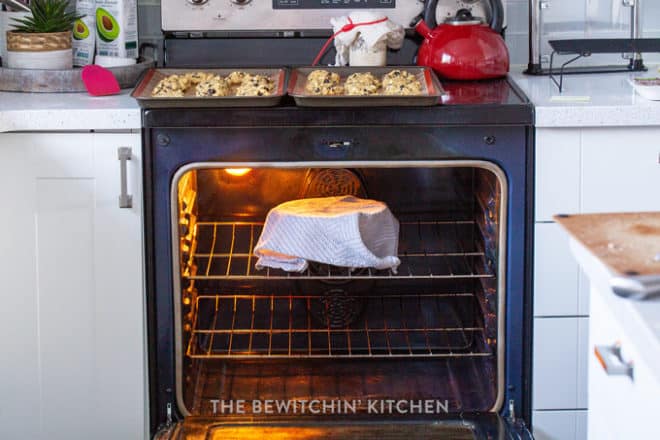
I’m lucky enough to have a proofing option with my oven. My house is usually cold (especially when it’s not the summer) so I hit bread proof, cover it with a clean towel, and let it rise for an hour.
If you don’t have a proofing option, you can turn on your oven and let the bowl sit on top. I have also let the bread sit over furnace vents in the past as well (this worked so well for my homemade buns).
Make what you have work for you.
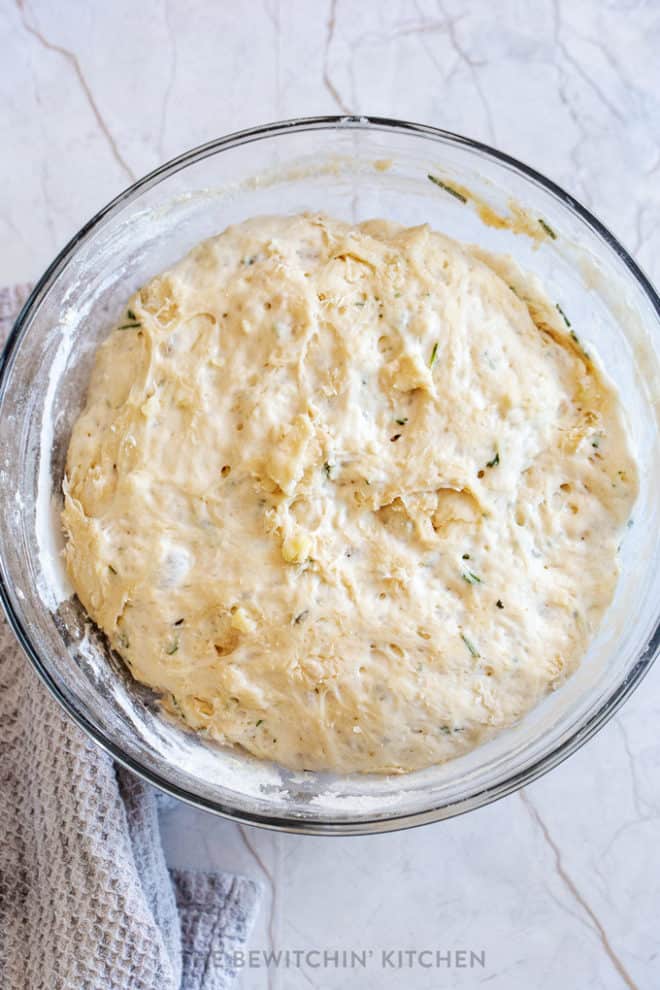
This is what the roasted garlic dough looks like after rising for an hour. I used a quick yeast because that’s always what I have on hand. I typically only ever make my family’s recipe for homemade buns and that requires the quick rise yeast, so that was that.
Can you use regular yeast? Yes. If you do let me know how it turns out in the comments.
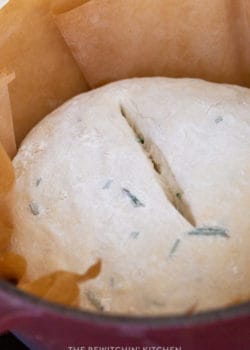
Scoring Rosemary Bread
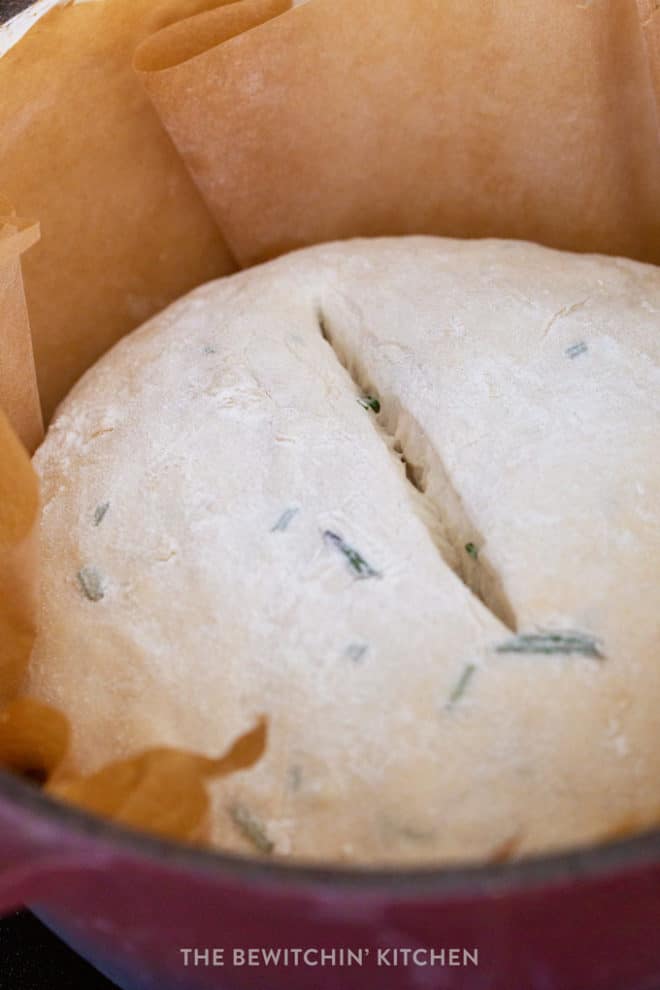
To allow the steam to escape while baking the bread, I scored my bread.
I did this by taking a paring knife and slicing down the center. You can make multiple slices or go the fancy route and make some pretty designs.
I’m a beginner at bread scoring, but one day I’ll attempt some pretty work. I’m not there yet.
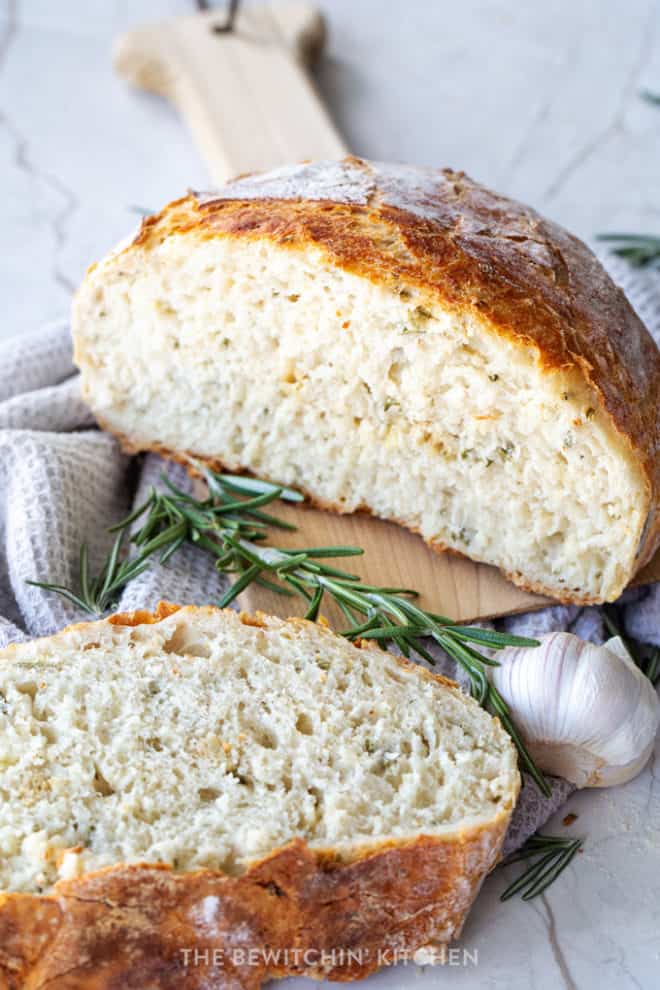
What to serve with homemade dutch oven bread
Don’t get me wrong, I can eat this loaf of bread on its own (especially with some salted butter) but I am all for homemade bread and soup. Here are a few of my favorite homemade soup recipes:
- Instant Pot Gluten Free Chicken Pot Pie Soup
- Zuppa Toscana
- Roasted Cauliflower and Cheese Soup
- Hamburger Soup
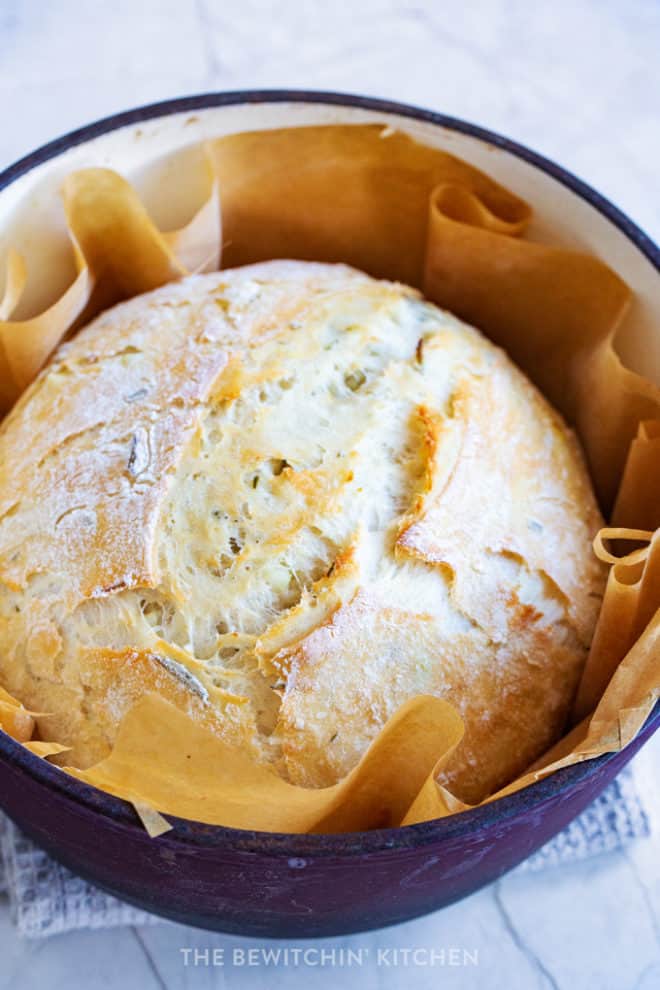
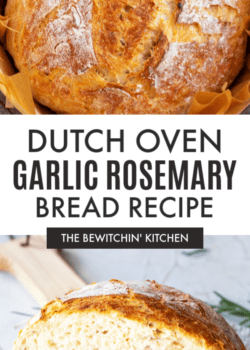
How to make rosemary garlic bread in a dutch oven
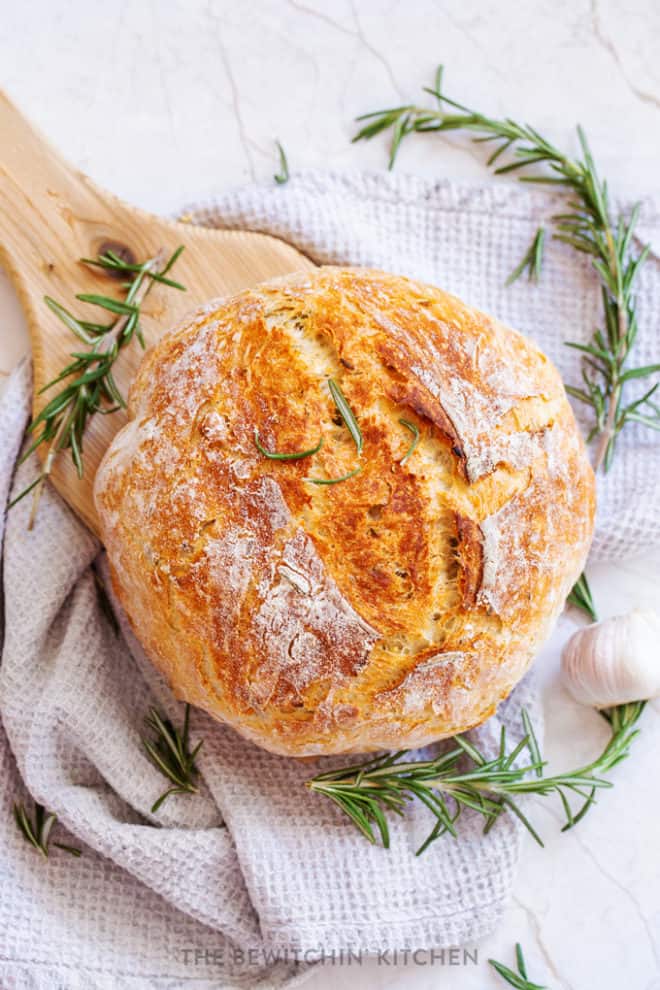
Baking garlic bread in a dutch oven is a game-changer. It doesn’t dry out and it’s like it hugs the dough to form this beautiful artisan loaf. I’ve tried so many bread recipes with garlic before, but this one creates such simplicity and a really beautiful pull apart bread.
I love this method of baking.
Turns out the steam of the bread works with the dutch oven to simply bake it to perfection. I’m not even going to pretend to know what I’m talking about here…all I know is that it works and it works well.
So just trust me on this one.
Do you bake bread? Do you have a longstanding family recipe or do you throw things together and hope for the best? Let me know in the comments…and be sure to share your recipe!
Next up on the bread experiment is Jalapeno Parmesan Bread. It’s delicious and you have to try it!
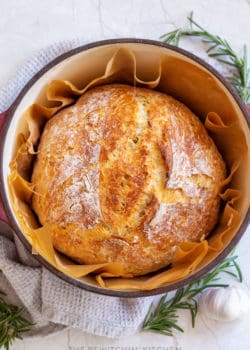
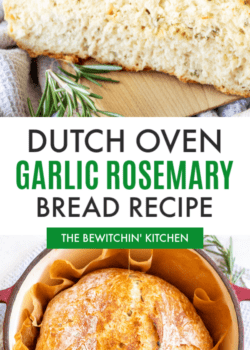
Dutch Oven Garlic Rosemary Bread
This dutch oven garlic rosemary bread recipe is one of my new favorites, and it’s so simple. There is seriously nothing more comforting than homemade bread.
Equipment
- 5.5 or 6 qt Dutch Oven
- Wooden Spoon
Servings 8 slices
Calories 187kcal
Ingredients
- 3 cups All Purpose Flour
- 1 1/2 tsp sugar
- 2 tsps salt
- 2 1/2 tsp quick yeast (1 package)
- 1 1/3 cups water warm
- 2 large rosemary sprigs taken off stems an diced
- 3 garlic cloves diced
Instructions
First Rise
- Add all of the ingredients to a mixing bowl and stir together. The dough will be sticky, shaggy and a hot mess. That's okay, it's supposed to be that way.

- Cover the bowl with a towel and let rise for 60 minutes. I used the proof setting on my oven, if you don't have that setting you can turn on your oven, and set it on your stove so it has a warm place to rise. OR you can set it near your warm air vents.
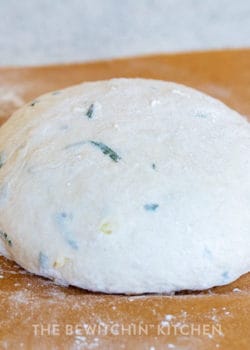
Shaping the bread
- Lay out a piece of parchment paper and dust it with flour. Transfer the dough from the bowl to the paper and behind shaping it. You'll want to stretch out each side and fold it over and work around until you have it in the shape of a ball. (Don't worry you can't mess this up).
- Flip it over to where the smooth side is up. Cover with the towel and let it rise for roughly 20 minutes (or until the dutch oven is read in the next step.
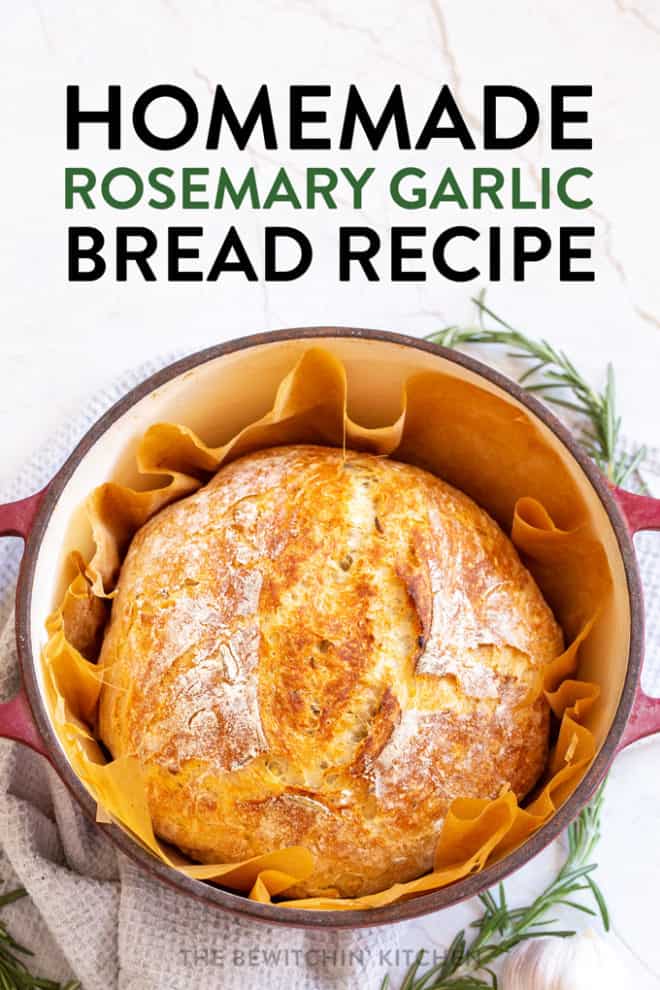
Heating the dutch oven
- Place the dutch oven in the oven (I didn't include the lid). Preheat your oven to 450F and let it come to temperature. Your bread will rise while your dutch oven heats up.
Baking the bread
- Using oven mitts, take the dutch oven out of your oven and place it on top of the stove. Lift the bread using the parchment paper and transfer it to the dutch oven. Score the bread to let steam escape while it bakes. I just did a simple slash down the center with a knife, but you can make it pretty with designs if you'd like.
- Cover with the lid and transfer it to the oven. Bake for 30 minutes. When it's done the color will be pale. Place it back in the oven without the lid for another 10 minutes, or until is golden brown of to your liking.
- Remove from the oven and lift the bread out of the dutch oven using the parchment paper. Let cool for at least 30 minutes.
- Serving ideas: butter and a sprinkle of sea salt, olive oil and balsamic, or straight up.
Nutrition
Serving: 1slice | Calories: 187kcal | Carbohydrates: 38g | Protein: 6g | Fat: 1g | Saturated Fat: 1g | Sodium: 586mg | Potassium: 90mg | Fiber: 2g | Sugar: 1g | Vitamin C: 1mg | Calcium: 9mg | Iron: 2mg
Follow On Pinterest Follow @bewitchinkitchen On Pinterest for more delicious recipes!
Tried this recipe?Mention @bewitchinkitchen or tag #bewitchinkitchen so I can see it!


I made this last night. So easy and so so good! It was my first time making bread and I’m so proud of myself. I did use active yeast instead of instant/quick and it turned out completely fine. I mixed it with all the ingredients and I didn’t dissolve it first. I also used rosemary that comes in a bottle bc I couldn’t find any fresh at the store. I love this recipe! Can’t wait to try others.
I’m glad you liked it! Thanks so much!
I’ve made this twice now, super easy and so delicious! I’m making it again right now, but with regular yeast. Based on previous comments, may need to add more flour. I also top mine with melted butter and some garlic on top in the last 10 mins. Yum!
My kitchen smelled absolutely amazing last night… Also, I used regular yeast. I mixed it with the sugar and warm water and allowed it to proof for about 10 minutes until it was nice and foamy. Then added the other ingredients. I’m not sure if it was that, or something else, but I had to add quite a bit more flour after the first rise, as there was no way I could shape the dough in any way because it was too sticky. With that being said, I just kneaded it in a bit with more flour and it was fine. I also forgot to score it, but it turned out AMAZING. Excellent recipe and I’ll definitely do it again! Also, did not wait 30 minutes after it came out of the oven… How do you do that?!
Ha! 30 minutes can be optional. I’m glad it turned out well for you.
I added more flour after 1st proof and kneaded some too.
Otherwise great receipe. Loved using the Dutch oven
Just tried this recipe and it’s delicious!! However, my dough was so liquidy after the first 60 minute prove. I included all the ingredients as listed. Any tips on how to make it more of a bread dough and less of a batter??
Amazing bread! When I removed the lid for the final ten minutes, I brushed the top of the loaf with olive oil, sprinkled dried rosemary, and a bit of sea salt. Delish!
I would love to make this with my sourdough starter instead of yeast. Do you know what the conversion would be? Looks and sounds amazing.
I use 50 grams of starter. I stretch and fold every 30 mins for 3 times then let it rise foe one hour. Then turn and shape and let you do its last rise. Score and bake.
I made this recipe with bread flour instead of all purpose flour. I will admit, it took me three tries to finally get it right! I really recommend measuring the temp of your water with a thermometer. I realized I was ruining my yeast with water that was too hot. My oven doesn’t have a proofing button and the keep warm feature was way too hot! So I just set it on the counter next to my stove while I cooked. My generic parchment paper said it can only go up to 420 degrees but I used it anyway. It crumbled a bit but no fires so it was ok. I used minced garlic from a jar and dried Rosemary because that’s what I had. My bread came out soooooo good! Next time I will transfer the dough to a new parchment in my Dutch oven and grease the sides so the parchment won’t burn and stick to my bread.
This was easy to do and smelled amazing while baking!!!!
First time making bread in my new Dutch oven. I am so new to bread making and this recipe made me more confident in my abilities ! Thank you so much for sharing. I know a few areas I went wrong but was able to save the dough and just let it rise longer after kneeing. It turned out delicious!
My Dutch oven is 7 qt. Will I need to adjust cook time? I assume it would end up being a thinner loaf…
Hi! My Dutch oven is 7 qt. as well. Did you make this bread? Did you make any adjustments?
I am fairly new to bread making and tried this last night. Made as directed but added about 1/3 cup of leftover cooked bacon and served with Zuppa Toscana. RAVE reviews from my otherwise picky family. They have requested that I make it again this week. I don’t have proofing on my oven but sat the bowl on top of the dryer as I was doing laundry and it worked out great! Thanks again.
Thank you so much! This is my first successful loaf of homemade bread. It is delicious. Has anyone tried adding cheese to it?
We’ve added cheddar cheese and in the last ten min during browning topped it with more cheese and it turned out incredible !
I’ve made it with Asiago cheese. Just add to the mixture with everything else. And then on top before putting in the oven.
Made this bread yesterday. I’ve been baking bread for 30 years. This is one of my favorite recipes that I’ve found. Despite not kneading, the gluten developed well. Chewy crust, soft tender interior. My rosemary wasn’t viable, so used a rough tablespoon of Italian seasoning along with the fresh garlic. Delish. Loved baking in my Dutch oven. Thanks for the recipe.
Have made this twice now to go with some homemade soup and it was super easy and a great success! My husband loves it. Thank you for making it easy to follow and for sharing the recipe!
I always weigh my flour. At approx 125 grams per cup, this recipe needed almost a full cup more flour than the recipe called for in order to get the dough to keep its shape and not be a sticky mess.
Because the loaf was already quite browned after the first 30 mins, I shortened the lid off bake time to 8 mins.
The loaf looks & smells wonderful, cant wait until dinner to slice into it!
Overall this bread was Amazing! It tasted and smells so good! Just couldn’t wait to cut into it!
But, the instructions weren’t very clear. I had to double check things with different blogs and recipes.
Little details like the size of the dutch oven. For some reason, I thought this was a no-knead loaf (partly my fault), but, I assumed the dough wouldn’t need to be kneaded, because the recipe never said to knead.
No clarification of the temperature. 450 sounds so hot for bread. But after researching more, I decided to go for it and it was right.
But again, this was a delicious bread and will make again!
Also tip for when kneading, to use a silicone mat, stays in place better instead of the paper. Then when it’s kneaded switch to the paper! 🙂
Looking forward to trying this recipe. My Lodge Dutch oven says not to use heat on an empty Dutch Oven. Can I put bread in cold one?
Catherine,
I have a Lodge Dutch Oven and have baked many loaves using the pre-heat method. Nothing has happened so far. The pre-heating time is so minimal. Go for it – this bread is delicious!
I know this is a comment from a few years ago, but wanted to share. It’s not good to hear the Dutch oven for an extended time on the stove top empty. In the oven to pre heat for baking bread is fine.
I’m excited to try this bread today!!
I have made tis bread several times…it is so easy and delicious! Im eating it with vegetable soup tonight. Thank you!
Than you Ann! I’m glad you like it!
I only have dried Rosemary. Can you use that?
Yes!
What size dutch oven do you need for this bread
I used a 6 qt round dutch oven. There is a link to find one on Amazon in the post you can click on to see what you need. However, I’ve also been succesful with 7 qt. You could probably go down a size too and still be fine. Maybe take a good pinch of the dough out. The dutch oven will just hold the shape of the bread, so the shape will vary depending on what size of an oven you have.
I did this bread last week and it turned out beautifully except that the bottom of the bread was burnt, I had to scrap it hard…I guess the bread needed to be placed in the middle of the oven? I put it in the lower part as I didn’t know… It was my first time to bake a bread.
First several tries the same thing happened to me. After researching this problem when baking Dutch oven bread, I found a solution that worked for me. Put the parchment in the Dutch oven. Sprinkle the parchment with corn meal–I did it sparsely, but covered most of the parchment. Place the dough on top of the parchment and bake as indicated. I live at 6400 elevation and wonder if that’s why the bottom crust was too tough to slice??? Anyhow, this solved the problem and the bottom bread crust improved tremendously.
Goodness!! Tried this tonight -needed a robust bread to have with stew & this fit the bill! Simple and so delicious! Thanks so much for sharing this!
Can I leave this to rise overnight? If so, where would I leave it? I’ve made this recipe a few times and it is out of this world. Absolutely delicious and a family favourite. Thank you!
Did you ever find out if it can rise over night?
Can I use gluten free flour?
I have let dough rise overnight and I notice that you cut back on the amount of yeast, considerably, like only use 1/2 tsp. there are a couple of no knead overnight recipes out there and that is the main difference I see. It really helps develop the flavor.
Oh this bread is delicious!! And so flipping easy! I’m making it again today! I couldn’t decide how I wanted to eat it but I love goat cheese with rosemary so I whipped up a cream cheese & goat cheese spread to put on it. It was so good!! Thank you for this awesome recipe!
This bread is AMAZING! So easy and it came out perfectly. I used bread flour because I had it and it worked out very well. Highly recommend. I will definitely be making this again.
OMG. I think you may have created a monster! I just got through making this bread and I couldn’t put the knife down!…It’s very addictive and so delicious! I especially like the quick rise(some other bread recipes call for a MUCH longer rise time). Thank you! 🙂
Oil the bowl before setting aside to rise. You’ll thank me later.
It turned out amazing! My only issue is the outside was so hard. Any ideas how I can get the outside to be softer?
I found that the best way to soften the crust, is to melt garlic butter and brush it over the entire loaf (don’t forget the bottom!). I made my own garlic butter with items I had at home (salted butter, garlic powder, and onion salt)…. You can be as creative as you like, or just use plain ole melted butter – it’s sure to do the trick. Remember to brush it on right after the loaf comes out of the oven and is resting on a rack. 30 mins later slice in and you’ll feel and taste the difference!
Can I used bread flour and not all purpose?
I used bread flour and it came out great
This was so easy to make and it came out wonderfully! I’ve been wanting to make bread and now I have and it’s glorious! Thank you for this recipe
No Dutch oven so I’ll be making it as a regular loaf of bread
Can you tell me if the loaf pans worked?
Will it change the outside texture if I brush garlic butter over the top?
It will soften the crust so it’s not as hard to bite into! 🙂
I have made this bread a few times so easy and delicious, it’s a huge hit! Iv switched to using an Italian herb blend instead of just rosemary and it’s soo savory! My only problem is everytime I make it, it gets burnt on the bottom. The rack is in the middle, definitely using parchment paper. What am I doing wrong?
I don’t usually comment on food blogs but this was the one of the easiest and most delicious bread recipes I have ever tried. It did not last long in my household because we all devoured it. This will definitely be a household staple!
Amazingwe almost ate the whole loaf. It was so easy didn’t change a thing.
This was absolutely amazing!! I used about a teaspoon and a half of dried rosemary, as I didn’t have fresh on hand and I added a extra garlic clove because why not lol. Delicious, soft, airy and crusty bread.
I came to see if anyone used dried rosemary! I’m glad you commented and said it came out great! Making those to serve with my pot roast that’s been cooking all day
I have been making no knead bread in a Dutch Oven for a couple of years now baking a loaf about once a week. I have used this method with a wide variety of flours and grinds to include white, whole wheat, spelt, and rye. Bread flour, all purpose, and even cake flour and all work fine. I even make sour dough breads using this method. One recommendation I have is to tale the parchment paper and wad into a tight ball. Then spread smooth out the paper for use. This will then fit easily into the dutch oven. As for the oven and proofing just turn it on its lowest setting for 10 minutes and you have a nice place for the dough to rise.
Omg… so delicious…..I did baste with a little garlic butter when out of the oven….PERFECTION!!! THANK YOU FOR SHARING
I made this using a 2.5 quart lidded Corningware bowl- mainly because I only have a very large dutch oven. It worked great. Recipe was just perfect.
I made this bread this morning in a loaf pan. My Dutch oven is full of soup (the accompaniment to the bread) so I tried the loaf pan. I put the loaf pan, empty, in the oven to heat up and then put parchment and the bread dough into the hot pan. I baked it for 30 minutes, no cover, and I got a beautiful little loaf of delicious bread! I will try the Dutch oven next time. Thank you for a delectable and easy recipe. Much appreciated!
I’m brand new to bread baking. I followed the recipe to a t. But for some reason I feel like my bread is coming out slightly wet? I’m not sure what I’m doing wrong or if it’s actually coming out the way it’s intended to…
It’s in the oven!! It’s looking so good. Using the Dutch Oven and We can’t wait to try it.
Thank you for this easy recipe
Regards Lynda
How well does this bread keep? There are just 2 of us.
The bread turned out DELICIOUS and beautiful!!! The crust was my favorite part Thank you for the recipe! I wish I could share a picture the way it turned out!
I forgot to mention in my comment above that I used 3.2 quart Dutch oven and it was just right for this recipe ( it was big enough for the bread not to touch the lid). Also I used my microwave oven for proofing the dough. I run a microwave for a minute with a cup of hot water in it first. Then turn it off, and place my bowl with the dough, mostly covered with the cream wrap, into the microwave leaving the cup of hot water by the bowl, and close the door of the microwave all the way. It creates a nice moist/warm environment for the dough to rise. (While the dough is there, the microwave SHOULD NOT be running!)
Thank you for this PRO tip. My house is always a little chilly and worn no proof button on my oven this was an incredible use of my microwave. I’m not sure I’ve ever had bread rise so well!
Just finished making this bread in my dutch oven. First time I have ever made bread and this turned out wonderful. Recipe was easy to follow and it looks like a nice rustic round loaf of bread. Going to be wonderful tonight with my Italian bean soup. Thanks for sharing this recipe. Definitely a keeper.
Great recipe! Didn’t finish it all at once, so I wrapped slices in plastic wrap, and put in a ziploc bag in the freezer. It was just as good after thawing and a short time in the toaster. Will definitely be making again!
Has anyone tried this recipe with gluten free all purpose flour?
Hey I think I did something wrong and I was wondering if you had any tips
for next time. My loaf came out very flat and wide with little height. It also browned very quickly but I think this is because I have a glass lid. Any tips are appreciated!
Yeast was probably inactive – dead. Check the date on your yeast or just buy some fresh. Good luck!
Make sure your water for proofing is not too hot. That will kill your yeast.
I just made this recipe , it was a bit sticky for shaping but I added flour as needed and as it was rising for second time scoring kinda disappeared but it still came out beautiful and tasty!
Can u use regular yeast? Can chopped garlic stay out and rise with bread for 8-12 hrs?
I make this bread on a regular basis – it’s AMAZING!! I feel so successful when it comes out of the oven lol
Yeast and I have never been good friends until now! Thank you!
What a great recipe! This was first try at bread baking! This will make great Christmas gift for my neighbors! Thank you!
I made this as is and it was amazing! Wanted to see if I could use whole wheat flour instead? If so, is it the same amount of flour? So excited to hear back!
I am wanting to make to give out on Christmas Eve. Can I make it ahead of time and freeze. If so, how should they reheat it? Thank you.
I have an Amazon basics Dutch oven, and it’s only oven safe up to 400°… can I lower the original temp to 400° and just extend the baking time, or did you have any luck with your Amazon basics Dutch oven at 450°?
I have the same and haven’t had a problem at 450. I’ve made this recipe a few times now.
I have never made bread before. This was my very first time making some. I love the recipe. Followed it exactly as listed. Just wondering if anyone knows about the quick rising yeast. The recipe calls for proofing, but the yeast I bought says no proofing required. Should you still proof it? It was edible and tasty but wondering if it should have risen more. Any expert tips. I used Fleischmanns Rapid Rise Instant Yeast.
I’ve made this recipe 2x in the last week. First time I made it the only sub i made was to use fresh dill from the garden instead of rosemary. Second time, i used the rosemary but baked it in a glass loaf pan instead of dutch oven. Didn’t pre-heat the loaf pan and cooked for 30 min uncovered so didn’t do additional 10 min like I did in dutch oven. Oh, I should also say that I used my kitchenaid mixer; didn’t stir up ingredients by hand.
The dough is annoyingly sticky but I just used a lot of flour on my hands and on parchment paper to help with that.
Terrific, easy recipe that we will definitely be making often.
I LOVE this recipe but in the middle of making it I realized I forgot I ran out of parchment paper! Is it a must have or can it be placed in the oven without?
Hi Raegan. Yes, it can be placed directly in the dutch oven if you don’t have parchment paper.
Just made this bread. OMG my house smells amazing! Super easy and beautiful! The hardest part is waiting for it to cool to cut into it! Thank you for this wonderful recipe!
I made this recipe exactly as written except I had the lid on my cast iron Dutch oven when I preheated the cookware. 30 minutes was all it cooked. It was beautifully browned and cooked throughout. Love the taste of the bread and it was so simple to make.
Can I double the dough recipe and cook it in a bigger Dutch oven for a larger loaf? What would I change the cooking time to?
Hi Laura. This is a great question. In my experience, bread is finicky. Slight changes to recipe or process can throw everything off. I have tested my exact recipe many times and feel really confident it will produce great results. In theory, doubling the batch in a larger dutch oven should be fine, but I can’t guarantee as I have only tested with the recipe written here.
I have made this bread for the past three weeks. So good! Makes an incredible sandwich. I have wondered about doubling the recipe as well. I hope someone can comment an update if they’ve tried it. Also I don’t have a Dutch oven but I use my crackpot bowl and preheat that. I also have a cookie sheet that fits on top. Since it’s not tight, it Does brown the bread but only enough to cut the last 10 Mims out of the recipe. I might buy a Dutch oven soon, but not necessary at this time
I made the bread with a few mods. It was delicious so crunchy but moist and chewy too
Pan=Didn’t have a ceramic Dutch oven and didn’t want to chance in a cast iron so I used a glass Pyrex baking dish. Covered with a metal top for 25 minutes
Knead: mixed it in my bread maker so it was kneaded.
Added garlic powder since i didnt have roasted garlic and didnt want to use refrigerated minced garlic
No Parchment paper
Coated in olive oil before putting in pan to bake. Brushed w/ olive oil after cooking and sprinkled w/ pink coarse Himalayan salt
Delicious and so easy to make! This was my first time attempting to make homemade bread, and it came out perfect, if I do say so myself. We ate half the loaf in one sitting between the 2 of us! Will definitely be making again… in fact, maybe tomorrow!
Made this following all directions except substituted fresh thyme for the rosemary. First time really ever making bread. Came out perfect, and my whole family is obsessed. Excellent recipe.
I just made this bread for the second time in 2 weeks.
So simple, and soooo good. Crusty outside and soft inside…and such flavor!
The added ‘plus’ is that my kitchen smells heavenly right now.
This recipe is a keeper!
just took it out of oven . the appearance .. the aroma .. and the taste ? Dddddeeeeeeelicious !! thank you for sharing
@bewitchinkitchen – THANK YOU for this recipe! It is fail proof and delicious. Fresh bread in 2 hours! Are you kidding me?!? Crazy awesome recipe – thank you.
this has become my go-to bread . I started making it about a month ago and just this week I have made it 6 times. I prepared it on 2 separate nights to bake it just before work . I also use it for sandwiches. turkey and pepper jack on this bread is delicious. The finished product looks and tastes as if this would be from a local bakery or as if it would be difficult to make, but it’s not
I made this recipe 3 times and gave up because the bread barely rose in the time limit of 60 minutes and was so sticky I had to add lots of flour to even handle it and lost a lot of the dough on my fingers. Unless it miraculously rises in my oven it gets a 1.
I’ve made this bread recipe 4-5 times. I’ve used diced jalapeno with cheddar cheese, Parmesan with rosemary and plain . Absolutely love this bread and how easy and delicious it is. Going to try cinnamon and raisins next. Thank you for sharing this recipe
So this is the second time making it. First time was last week. Im new a baking and this was super easy. Not sure what size my dutch oven is. But i added extra garlic and rosemary and some cheese. Thanks for the amazing recipe!!
I loved this tip! Brushed with evoo before the last uncovered 10 mins – and added flaked sea salt to the top. Thank you!
I made this recipe today and it was amazing. The crunch of the crust was delightful. I brushed it with olive oil and some Italian seasonings as soon as I removed it from the oven. I’ll be making more tonight but I’m going to try it in a loaf pan.
Thank you for this tip! I brushed it with eco the last uncovered 10 mins – and added flaked sea salt to the top. It looks picture perfect!
I’m a big fan of the Gimme Some Oven No Knead recipe.
I used bread flour and active dry yeast instead of quick yeast. Mixed all the dry ingredients together before adding water and it came out perfectly. I do adjust my water based on the humidity. I add one cup of water first, mix it in, then I add a little bit at a time until the dough looks right. Sometimes I need more water, sometimes less.
Also, I aerate my flour before I scoop it so I don’t end up using more flour than the recipe needs.
I will definitely make this again. Thank you!
Hi.. I’m trying this recipe Sunday for family get together.. Hire for is the cut or score for the bread.. Thanks
How deep should the score cut be
This garlic rosemary bread looks absolutely delicious! I can’t wait to try this recipe at home. The aroma of garlic and fresh herbs must be amazing. Thanks for sharing such an easy and flavorful idea!
This garlic rosemary bread looks absolutely delicious! I can’t wait to try making it this weekend. I love how simple the recipe is, and the combination of flavors sounds perfect. Thanks for sharing!
This was so easy to make ! I do not have a Dutch oven so I used a deep cast iron with aluminum foil over the top and it worked perfectly!
Thank you for the idea! My Dutch oven is a 9 quart, so I wasn’t sure if it would work.
Made this bread and it’s my family’s favorite! Can I make this bread ahead of time and freeze it?
Was this too salty for anyone else?
I had to substitute the roasted garlic cloves and fresh rosemary. I used 3 teaspoons of minced garlic. I wrapped it in foil then broiled it on low on a cookie sheet for 7 minutes. I used 1 1/2 teaspoons of rosemary. I bake it for 25 minutes abd remove lid the 7 minutes. If any longer too done. Then I rub butter on all sides. It’s so yummy thank you!!
Fail proof recipe!! I love it!
This garlic rosemary bread looks absolutely divine! I can’t wait to try this recipe. The combination of flavors is so inviting, and it seems like the perfect addition to any meal. Thank you for sharing such an easy and delicious recipe!
This recipe is fantastic! I add 1 cup of shredded Parmesan cheese the bowl when I throw all the ingredients before blending them. After it rises twice and do a shallow C across the top and add another 1/4 cup of shredded Parmesan cheese to the top. Then I put it in the oven for the 30 minutes, remove the lid and do the browning, and it turns out BOMB!! I also use this base dough recipe to make jalapeno cheddar bread. I dice the jalapeños very small and add them and a cup of shredded sharp cheddar to the ingredients before blending into dough, then again another 1/4 cup of the sharp cheddar across the top after I X it, about 10 thinly sliced jalapeno rings across the top of the shredded cheddar, and it turns out AMAZING! I wish I could post pics of all 3 types I use this base dough recipe for.
This garlic rosemary bread looks absolutely delicious! I can’t wait to try this recipe at home. The combination of flavors sounds perfect, and I’m sure it will make my kitchen smell amazing. Thank you for sharing such an easy and tempting recipe!
Has any one had success with freezing this bread? We make it often but I was wondering if I could make a bunch one day and freeze
Foolproof bread recipe and so fast!! I’ve made this probably 15 times in the last year and it comes out great every time even when I have doubts going into the oven. I put in extra garlic and rosemary just to enhance the flavor and smell. Also tip: before you put your bread in the preheated Dutch oven, place two ice cubes at the bottom and place the parchment and bread down and cover. The steam will help make it rise more and not form too hard of a crust. Beyond amazing recipe, everyone is always impressed when u make bread.
This garlic rosemary bread looks absolutely divine! I love how easy the recipe is, and the combination of flavors sounds perfect. Can’t wait to try it out for my next dinner party! Thank you for sharing! ✨
This garlic rosemary bread looks absolutely delicious! I can’t wait to try this easy recipe. The aroma of garlic and fresh rosemary must be heavenly. Thanks for sharing such a fantastic creation!
I have made this recipe so many times and everyone LOVES it. I have found better success if I fold in the garlic after the first rise. I use already minced garlic, so I drain it a bit and use 2 -3 tbsp depending for whom I am making it. The loaf ends up with a much better shape. (More sphere, less pancake). Thank you for sharing!
This garlic rosemary bread looks absolutely delicious! I can’t wait to try making it myself. The aroma of fresh garlic and rosemary must be heavenly. Thanks for sharing such an easy recipe!
This is my go to bread recipe. As soon as I make it, it’s gone. It’s so good
This garlic rosemary bread looks absolutely delicious! I can’t wait to try making it myself. The combination of flavors is so inviting, and I love how simple the recipe seems. Thanks for sharing this wonderful idea!
Such an insightful and well-written post! I love how you took the time to really dive deep into the subject and provide thorough explanations and examples. This is one of those posts I’ll keep coming back to for reference. Thank you for sharing your knowledge with us in such an accessible way!
This garlic rosemary bread recipe looks so easy! I gotta try it this weekend. The dutch oven method seems like a game-changer. My kitchen will smell amazing! Thanks for sharing!