Super Easy DIY Wainscoting
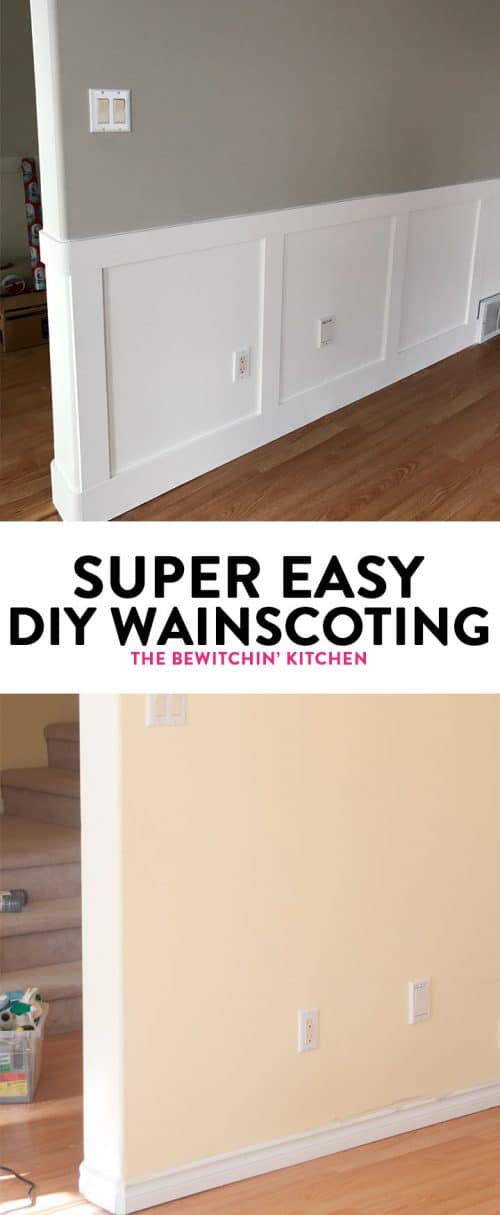
This DIY wainscoting project is my favorite home renovation project that we have done. It’s been a long time coming and I can’t wait to share the results.

DIY Wainscoting is a project that anyone can do. You need some really basic tools like a saw, hammer, nail gun, tape measure, and paint supplies. Depending on the size of your room, you can complete this project in a day if you work fast.
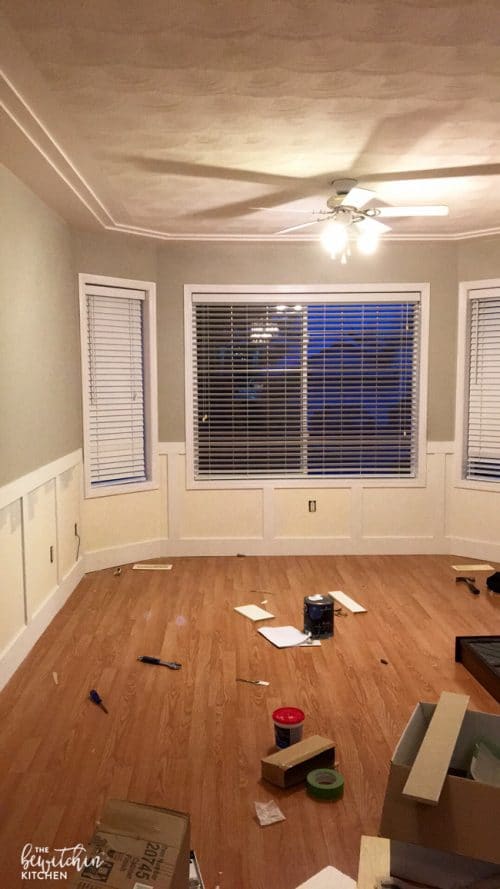
This room looked like this for months.
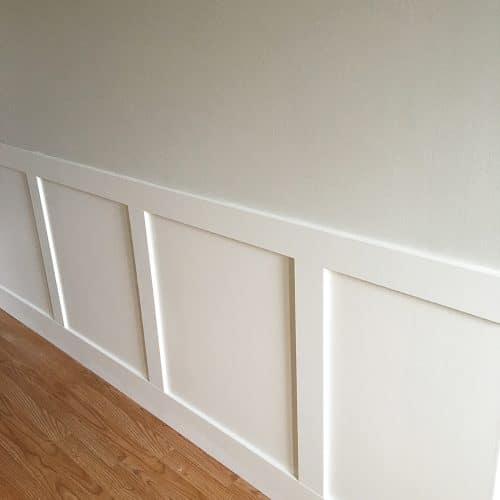
DIY Wainscoting
This post contains affiliate links for your convenience.
The project starts up fast with cutting and nailing boards. After the boards go up, that’s when the work begins. Puttying, sanding, caulking, and painting. All four of those tasks are at the bottom of the favorite pile and (naturally) that is what I was in charge of with this wainscoting project. Wainscoting or board and batten? Honestly, I’m not sure. I have called it both.
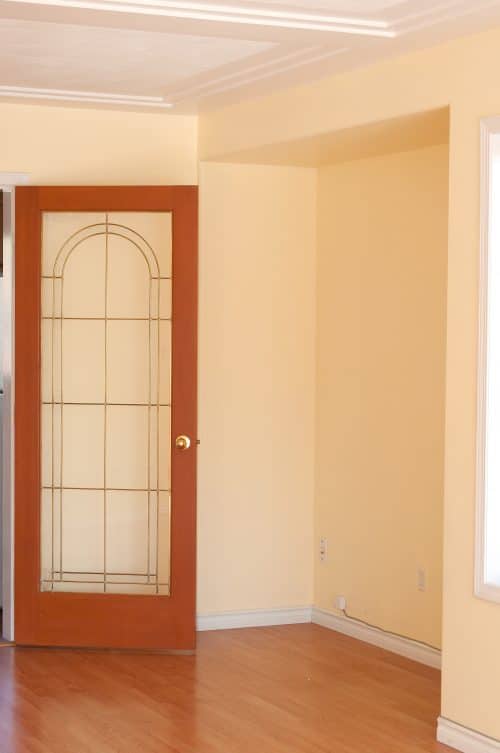
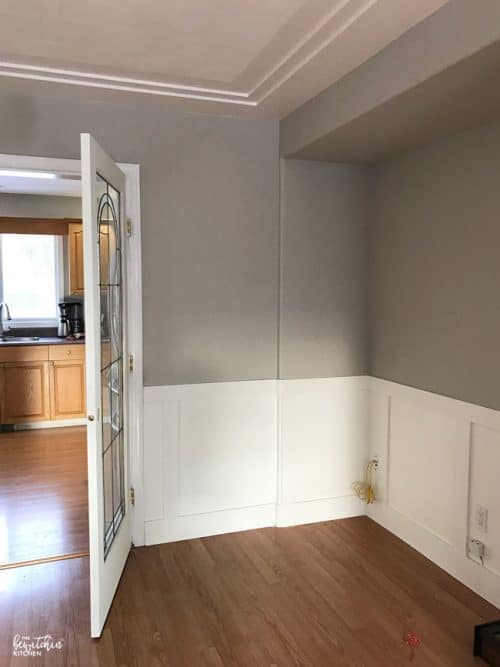 Another before and after.
Wainscotting Supplies
Choosing the size of framing boards
At our house we have a 5.5″ baseboard around the house. That made our base board selection easy. Just use what was already there.
For the top piece and the vertical separators, we used a 3.5″ board. The bottom is slightly larger than the sides and top, which I believe gave it a really nice appearance of depth overall. I believe if we would have went with 5.5″ all the way around it would have been too bulky.
I have also seen others use molded trim with additional designs. For us, cutting those 45 degree angles and possibly mitering corners was a no-go for molded trim. Using flat boards kept the project simple so that anyone could do it.
- 3.5″ x .5″ primed boards (top piece and separators)
- 5.5″ x .5″ primed board (baseboard)
- Nail gun
- 1 3/4 ” nails
- Paintable caulk + caulking gun
- Putty – I like this one because it goes on pink and dries white.
- Sanding blocks
- Paint – I used Benjamin Moore’s, Cloud White.
- My walls in the main living room is Revere Pewter, the hallway is Classic Grey.
TBK’s Pro Tip: For paint, I used both the Ben line and the Aura line in my rooms. Go with Aura. You save so much time.
How I did it:
Measurements and Spacing
Floor to top of wainscoting: 36″
Spacing in between: 24″
This was our ideal choice for spacing. 36″ tall by 24″ wide. Depending on your room size however, you will need to adjust. In some of our rooms we went a little bigger, and in some we have slightly different size panels on the same wall to accommodate the space.
The most important part about creating your own wainscotting is to get your top line straight and then fill in squares as you deem appropriate for the room.
Things to consider to determine spacing for your wainscot panels:
- Do you have furniture or a TV that your vertical lines should frame or try and match?
- You will want to always have multiple panels to ensure the effect you are going for is understood. If you have a smaller wall, the vertical spacing will need to be smaller.
- My personal preference is that the vertical spacing remain consistent throughout all walls in a given room. So if one of the walls in the room is shorter, decide how that will affect your design throughout the other walls in the room.
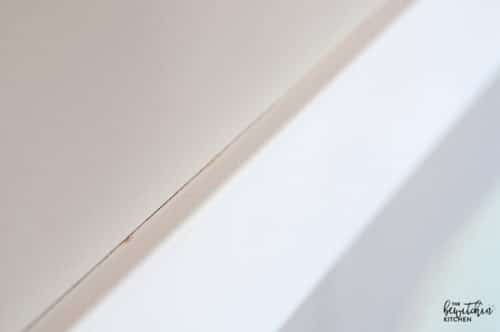
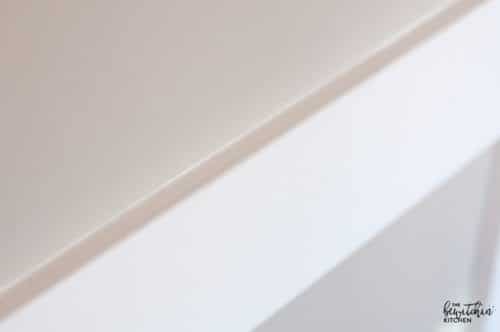
Caulk to remove the seems
Caulking is the savior of this project. As you can tell with the following two images, it fills the cracks and makes everything look seamless. Use putty on the nail holes (and any dings in the walls or the wood) and fill the gaps and cracks with caulk (just make sure it’s paintable).
To create really even caulk lines, run a light bead of calk as consistently as possible directly in the adjoining cracks. There are a number of tools available to help the caulk smooth, but for me, a finger does the trick. Just lightly run your finger down the bead of caulk to press it into the crack and create an even seamless look.
We also used a simple putty to fill in all the nail holes. Again, a finger application works great. Apply the putty, let it dry, and take a really light sand paper to it to make it disappear.
Choosing the right colors
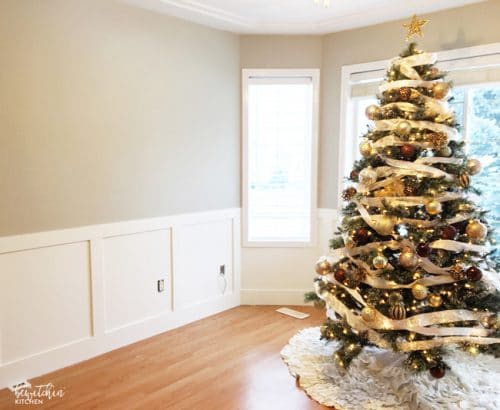
In both living rooms, the Cloud White wainscotting is paired with Benjamin Moore’s Revere Pewter. In the hallway, it’s paired with Classic Grey. For me it was important for the batten board elements to have some contrast with the other color on the wall. The contrasting paint colors helped the simple design to pop a little bit more and take on a deeper 3D appearance.
I do believe you could paint the wainscot dark and the upper part of the wall light and it would look great too. The most important part is to have different colors on the wall to provide that illusion of greater depth.
Two coats of paint
The Benjamin Moore paints covered everything well in two fast coats. Because we used primed boards all the way around, it was simple to tape a top line on the wall and then use a roller and brush to apply the neutral color to the panels.
As you can see in the photos, we covered both the framing boards and the inside of the panels in the same color. The first coat looked good, but after looking at it again the next day, it was obvious we needed a second. The second coat of paint made it perfect!
Once things dried just a bit, we removed the tape we placed on the wall, and applied new tape to the top edge of our paneling.
Pro Tip : Take extra time to get this step right as the line could make or break the project.
We then applied new paint to the top of the wall.
More DIY house projects I’ve done:
Painting Kitchen Cabinets
Painting Kitchen Countertops
Home Office Makeover
Bedroom Makeover
DIY Kitchen Renovation
How to stain a deck


looks fantastic, what a fun project to try and what a difference it makes
It’s amazing what some wainscoting and paint can do!
It looks great Randa!!!!!
The before and after pictures are amazing. What a difference! It looks like a lot of work thought but worth it in the end. I love the grey you picked to off set the white. Also I noticed you painted the door to match the trim. It looks a 100X’s better and very stylish!
I used chalk paint on the door, but I’m not loving it. I think I’m going to simply replace it with a new door in the new year. Thanks!
Looks amazing!! Nice and classic 🙂
looks great, I want something similar in my place
It was really easy to do Debbie, just time consuming with all the little things. I’m so happy with it though!
It looks so nice! I love your colour choices!
Allot of work but looks well worth it, you did a beautiful job.
Wow,that looks wonderful! Thanks for all the little tips and tricks… I have a dining room I have wanted to apply this finish to.
How did you get the wainscoting to wrap around the rounded corners?
At Home Depot they have trim pieces that fit on the round corners! They’re awesome!
The floors look darker. Is that an optical illusion? I like it! What did you do, and was it costly?
It could be the lighting, or the time of day when I took it. 🙂
How do you make sure the horizontal boards look like one long piece (as much as possible)?
Caulk and putty are your friend for this! Once that’s dried and evened (sanded if you’re using wood putty) the paint hides it.
What did you do with the baseboard? Did you rip out and replace? It looks great!
Hi Su,
Yes we did rip out the original baseboard and we used the thicker board I listed in the supplies 🙂 Thanks!
Did you nail boards into wall studs, or glue? How exactly to attach the boards?
Hey Brenda,
We used a nail gun 🙂
Where did you find .5″ thick board? Everything in the box stores is .75 thick. Thanks
Hey Jason,
I picked them up at Home Depot, I just double checked and they’re .5″.
Did your walls have any texture on them? Mine do (wahhhh wahhhh). If so, how did you handle that? Also, I have short (you know) baseboards — then quarter round to cover the gap between that and the hardwood. Did you have anything like that or maybe your boards butted up against better? My wood was added later . . . so, here, it is normal to hit the baseboard (without removing) and then quarter round it for the gap. It looks GREAT!!! Thanks for sharing.
Hey Sherrie! No, my walls were not textured. I had a bunch of holes and scrapes in them though 😉
If the walls are textured, something you can do is add a thin piece of MDF board. I almost went that route originally and realized I didn’t have to. So place the MDF behind and then build up from there. I haven’t used quarter round, but I might soon. I have to rip out the flooring in a few of the rooms and I don’t want to rip off the baseboards too haha. So I may use quarter round to cover the gap if I have to cut them.
Love what you’ve done it is beautiful. I was just wondering for the crown molding did you install that yourself and if so how?
Hi Marie,
No we didn’t install that. It came with the house. I like my ceiling too 🙂
Looks great! Something we might do! What color is the grey you chose? Sooooo many greys! And I love this one!
Hey Mandie!
The hallway is classic grey and the rest is Revere Pewter (all Benjamin Moore).
Hi! I love this so much! It turned out beautifully! We are in the process of doing this in one room in our house. Do you have any areas where your new baseboards meet the old ones? We can’t figure out how to transition them to the old ones because of the height difference and because they are thicker than the one ones!
XO Bekah
Hey Bekah,
We ripped out all the old baseboards and put up the new ones for that reason.
I did this using SW EXTRA WHITE in Satin 3 weeks ago looks amazing but now starting to get dust caught in the grooves. I feel it’s a big high maintenance. I have gotten a small duster broom, but there is still dust almost stuck in the little corners. I have had to get a small rag and use my finger to scrub the corner. Any suggestions on cleaning for dust?? Pls help. I used pine wood over existing wall. Thinking of re painting it semi gloss. I don’t know…;(
I get a little dust build up as well, I believe the satin can make it a little high maintenance too (but that could just be my theory) but I think its worth it. I went back and forth between satin and semigloss for a long time but opted for satin for the look but if you want semi gloss, I don’t think it would look terrible. Maybe get a sample and paint an area.
Hi-
I’m hoping your’e still watching the comments on this page. Could you provide the link to the 0.5″ thick materials you used for the trim? I have looked and cannot find it.
Thanks!
Hey Alison, I didn’t buy it online. I just went to Home Depot and grabbed some in their molding/trim area.
Where did you find the flat panel wainscoting? Home Depot only has raised panel! Thank you!!
Hey, it’s actually just the wall and I painted it 😀
On the long stretches of hallway or walls, did you cut the boards to not make each piece so heavy? We have 8″ boards and wasn’t sure if they should be trimmed to not bear so much weight on the nails. I know you may not remember 4 year later 🙂
8′ not 8″ haha
Hey Kayla,
No we didn’t. I asked my husband to double-check and he confirmed that we would never do anything that required extra work on our part (hahaha).
Did you just but the joints, or did you cut them at an angle to fit in corners ? And do you need a table saw?
How did you do the corners?
Hi, how did you do the rounded corners?